Monday, 9 December 2024

Merry Christmas

 good morning to all

no cards to share today as this will be my last post for 2024, but i would like to take this opportunity to wish you all a very Merry Christmas and Peaceful New Year.


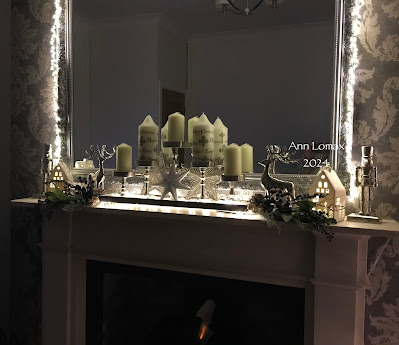
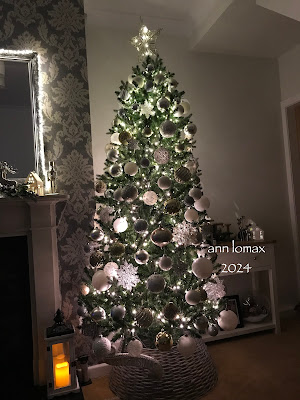
every year on the 1st of December our Christmas tree is decorated and for many years when my children were young i'd convinced them that a christmas fairy always visited and decorated the tree for them especially when they'd been good.


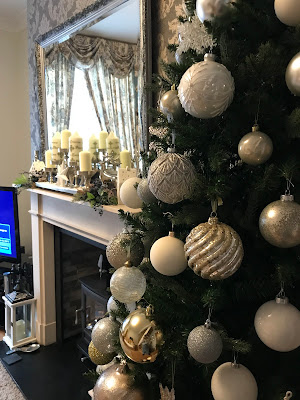
a special bauble from new york


every year i have the intention of decoratating the outside of our home but i never get around to it and the only room i have left to bing into christmas is my kitchen.
i have a rather long garland to add and thankfully my festive lights are already on the units.


 again i'd like to thank everyone for visiting my blog and i wish you all a very merry christmas and i'll be back in the new year with new projects to share.

thanks for stopping by enjoy your christmas and
craft happy, Ann


Friday, 6 December 2024

merry Christmas - using Maddie

good morning to one and all.
well we are now in december (gasp) and preparations are in full swing for christmas, my home is looking very festive this year, photos of this year's tree will be shared at a later date. 
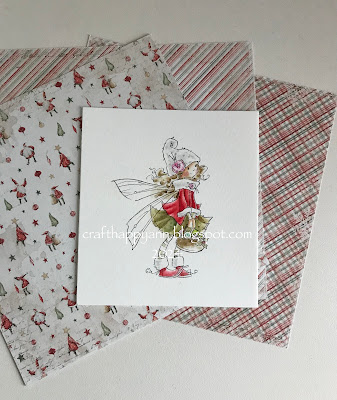
back to today's festive share and i've used Maddie and i've gone for none traditional colours on this christmas card.


i have also used another new stamp that has been sat in my stash for a while waiting for it's first outing. a big and bold set from colorado craft company.


my papers are first edition (i can not remeber the name of the pad)


and i've kept the design and colour pallet very simple.


onto what i have used

inks:
fade resistant dye ink: memento - expresso truffle
Tim Holtz:  distress ink
vintage photo, tattered rose, walnut stain, antique linen, worn lipstick, broken china, tumbled glass, tea dye, aged mahogany
papers:
watercolour paper: langton hp - smooth
deigner papers: first edition 6"x 6"
glitter card
silver miri card
7" x 7" base card
stamp:
pergamano poppet: Maddie
colorado craft company big & bold
dies:
sentiment - my stash
mft - stiched ovals, jumbo fishtail banner
miscellaneous:
distress ink pads: tumbled glass
sakura glitter pen
foam pads
double sided tape

where you can buy:
stamps: clarity crafts, dies to die for
papers: the mad scrapper
dies: on line stores and craft fairs

all it leaves me now to say is:
thanks for stopping by enjoy your day and
craft happy, Ann


Monday, 2 December 2024

Merry Christmas - using Melody


good morning crafters
back to share my second festive card today using Melody.
my image has been painted with distress ink using some newer colours that i've added to my distress ink pallet. 


 i do enjoy using distress ink and i also use the valuable lessons and technics i have gained from kit and clowder. Alyce is an excellent teacher, everything you learn is transferable to using other mediums.
 

various views


designer papers used for this card


for this design i have dug out a few of my dies and a new sentiment stamp to complete my project. 
taking snaps shots:
i have tried various layouts when taking photos of my projects but at the minute i am in the middle of rearranging my craft room and once i'm happy with how it's laid out hopefully i will have a proper area to take my snaps until then my living room mantle will do but then again i will be in a teather as my christmas tree and christmas displays are on the agenda this weekend. lol

onto what goodies i have used:
inks:
fade resistant dye ink: memento - expresso truffle
Tim Holtz:  distress ink
vintage photo, tattered rose, walnut stain, antique linen, worn lipstick, rustic wilderness, kitsch flamingo, frayed burlap, speckled egg, lumberjack plaid
papers:
watercolour paper: langton hp - smooth
deigner papers: maja - christmas nostalgia
glitter card
white card
7" x 7" base card
stamp:
pergamano poppet: Melody
lavinia - winter sentiments
dies:
creative expressions - merry christmas
my stash: stars
joycrafts
miscellaneous:
distress ink pads: frayed burlap
sakura glitter pen
foam pads
double sided tape

where you can buy:
stamps: clarity crafts, lavinia stamps
papers: the mad scrapper
dies: on line stores and craft fairs

all it leaves me now to say is:
thanks for stopping by enjoy your day and
craft happy, Ann


Friday, 29 November 2024

Merry Christmas - using Monique

good morning all.
with christmas just around the corner and a couple of male cards i needed to make out of the way i've managed to do some festive card making so i thought i'd share some new makes from the images i have coloured recently.
stamps used are pergamano poppets which i picked up from Clarity crafts.
 

i do have a few poppets in my stamp stash and have yet to use some of them. i do how ever have a lot of stamps in polymer and rubber of various brands but like most crafters i do like doing other things and i'm guilty of buying more craft things and leaving them for later and at this rate i'm not going to manage to fit every crafty thing in, tongue in cheek comment....of course they'll be used. 


a little floral addition to give it a chrismassy feel


i do love maja design papers and when funds allow i stock up on them including the latest releases wich i managed to pick up from the mad scrapper.
the choosen papers for todays card project: holiday in the alps.


and here is my list of goodies:
inks:
fade resistant dye ink: memento - expresso truffle
Tim Holtz:  distress ink
vintage photo, tattered rose, walnut stain, antique linen, worn lipstick, rustic wilderness, candied apple, festive berries, lumberjack plaid
papers:
watercolour paper: langton hp - smooth
deigner papers: maja: holiday in the alps
glitter card
white card
7" x 7" base card
stamp:
pergamano poppet: Monique
dies:
sizzix thinlets by Tim Holtz - holiday greens
mft - stitch oval
joycraft - snowflake boarder
miscellaneous:
distress ink pads: antique linen
sakura glitter pen
wild orchid flowers
foam pads
double sided tape

where you can buy:
stamp: clarity crafts
papers: the mad scrapper
dies: on line stores and craft fairs

all it leaves me now to say is:
thanks for stopping by enjoy your day and
craft happy, Ann


Monday, 25 November 2024

happy birthday grandson, image: LOTV

hi and welcome to my share for today.
as mentioned in my last post i'd made two quickish male cards inbetween some christmas colouring i'd done and today i'd like to share 
a birthday card for our grandson who happends to be called Oliver. 
the image is Oliver kickabout by Lili of the valley and he has been painted with distress ink.


i have used a variety of stamps, a little masking and one die to create a cas styled card. the teen boy stamps that LOTV have created are a great addition to a stampers stash for the awkward teenage boy in all our lives. 


here is a photo of the coloured image before i masked and added my extras.


well Oliver turn 14 recently and liked his card especially when his birthday pennies dropped out. lol

here is my list of goodies:
inks:
fade resistant dye ink: memento - expresso truffle
Tim Holtz:  distress ink
vintage photo, tattered rose, walnut stain, antique linen, faded jeans, worn lipstick, festive berries, candied apple, frayed burlap, black soot, lost in shadow, lumberjack plaid
papers:
watercolour paper: langton hp - smooth
deigner papers: maja: sea side
7" x 7" base card
stamps: 
LOTV: Oliver kickabout
sentiment stamps: 
kaiser craft strip stamp
die:
spellbinder - enclosed sentiments
miscellaneous:
distress ink pads: faded jeans, walnut stain
foam pads
double sided tape


thanks for stopping by enjoy your day and
craft happy, Ann


Monday, 18 November 2024

birthday boy - lotv image


good morning crafters, back to share a male card today.

i do enjoy creating male cards and today i've used one of my trusty images from Lili of the Valley: Oliver - game boy. 
Oliver has been painted with distress ink (colours will be listed below) and my completed card has been created using new papers: sea side from maja desgin which i picked up from the lovely Janine over at the mad scrapper


Painted with distress ink
on my image i have masked oliver and used another of my large LOTV. sentiment stamps: birthday not too sure if the large stamps are still available as digi's i think the polymer stamps have been discontinued, i do like the effect the large stamp gives to the fininshed card.

Oliver Game boy: LOTV


my card has been sneeked in between the christmas images i have coloured that are now waiting to be completed as i had no male cards and i needed to create something quick as it was my grandsons birthday yesterday (his card will be posted next week sometime). phew

and here is my list of goodies:
inks:
fade resistant dye ink: memento - expresso truffle
Tim Holtz:  distress ink
vintage photo, tattered rose, walnut stain, antique linen, faded jeans, worn lipstick, mowed lawn, weathered wood, speckled egg, rustic wilderness
papers:
watercolour paper: langton hp - smooth
deigner papers: maja: sea side
7" x 7" base card
stamps: 
LOTV: Oliver game boy
miscellaneous:
distress ink pads: faded jeans, walnut stain
foam pads
double sided tape


thanks for stopping by enjoy your day and
craft happy, Ann


Sunday, 10 November 2024

a little distress ink colouring

 Good morning crafters.
popping in with quick post i thought i'd share a little colouring i have done recently, it has been four weeks since i dusted my paint brushes off and also with christmas around the corner i couldn't resist purchasing these adorable stamps from Carity Crafts.
i'd like to welcome to my stamp stash:
Maisie, Monique, Maddie and Melody.


i do have two more images waiting to be painted:
Mel & Mia.
and as soon as they are complete they will be shared.

the images above have all painted with distress ink and have been matched to papers i've wanted to use for a little while, three cards i will be using papers from Maja Designs and one using first edition papers and in the next few days or so i will have some Christmas cards to share, yay.

so for now,
thanks for stopping by, enjoy your day and
craft happy, Ann.


Thursday, 10 October 2024

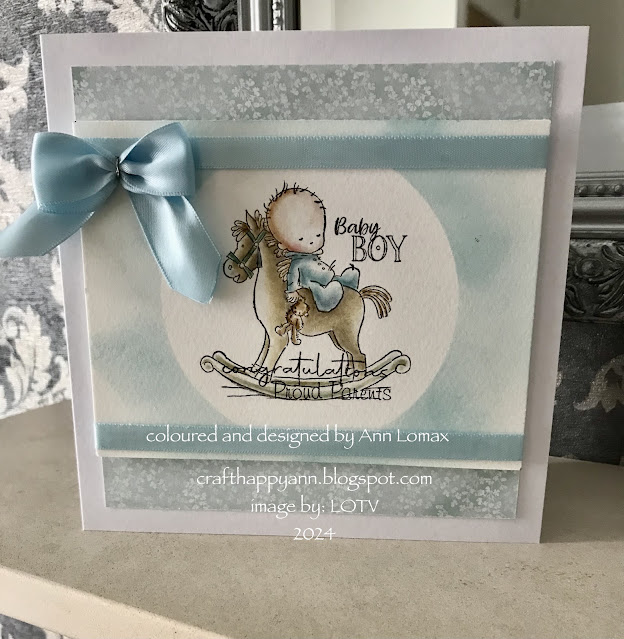
New baby congratulations LOTV images

good morning crafty friends
welcome to my shares for today. 
i have two personel celebrational cards to share for one of my close friends to celebrate the birth of their first grandson and the other for their son & daughter in law to celebrate the birth of their first baby, Harry John.


my images have been painted with distress ink and sadly my photos don't do the images much justice as i was in a rush to finish and post them off to their respective addresses.
on my first image i've gone a little grungy, my original idea was to create a shabby chic card and i was going to add frantage embossing powders but i'd added my designer paper to the card and heat embossing the frantage powder was a no go after sticking down papers to the card... so i added some distress mica spray as an alternative and i let it dry naturally, sadly you can't see the shimmer of the mica.
my second card, again i've gone for a grungy image with simple lay out and to complete the look i have masked the image with a cicle and coloured the outer edges with one of my distress ink pads and added a little ribbon to complete. 


a short post today.

and here is my list of goodies:
inks:
fade resistant dye ink: memento - expresso truffle
Tim Holtz:  distress ink
vintage photo, tattered rose, broken china, walnut stain, black soot, antique linen, old paper, faded jeans, stormy sky, pumice stone, aged mahogany
papers:
watercolour paper: langton hp - smooth
deigner papers: mintay, graphic 45
7" x 7" base card
stamps: 
LOTV: rocking horse
sentiment stamps: stampingallday, mft, lotv
miscellaneous:
distress mica stain: decayed
foam pads
double sided tape
satin ribbon
blue peg
sakura gel roll glitter pens


thanks for stopping by enjoy your day and
craft happy, Ann


Monday, 16 September 2024

Twinkle a natural fibre art doll


hi and good morning crafters.
popping in and happy to share a new natural fibre art doll whom i've named twinkle. 
from start to finish the doll took around three/four weeks on a part time basis. needle felting a dolls heads and parts of the body is so time consuming but it does make for beautiful dolls with cute features, still plenty to work on with future dolls. 


the inspiration for the doll and her name came from the colour of weft i'd choosen and a pre-made pixie hat that was made a while ago which was in conjunction with that i'd recently started watching dinner ladies by Victoria Wood a program i really enjoyed and one of the characters in the program was called Twinkle played by Maxine Peake who's hair was coloured pink also the hat and scarf have gold threads entwined which twinkle.
for Twinkles' clothes her dress and the hat were knitted a while ago and the scarf i knitted last week.


there will possibly be tweaks made to the outfit, i may make a different dress, she also needs underwear, tights or socks are needed and a coat or cardigan to complete her outfit.
they are all in the pipe line, i just can't decide what just yet.


Twinkle is approx 12"/29cms tall


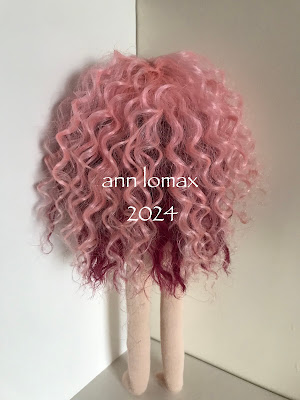
Twink's hair/weft has been sewn directly onto the fabric which gets a little tricky when you get to the finishing point, i have used two colours from my stash of curly wefts.


here is a few doll in progress photos


with the knowledge i have gained from north coast dolls for the articulated head i have adapted one of my body patterns to create this doll.
i do still have more things to improve on in my doll making process and i need to evolve my body patterns but for the moment i'm a happy little crafter. 

things i need to learn/do better: crocheting with a weft.

i still struggle to crochet and how on earth i managed to do it back in may is beyond me.. i did have a little help from Meglena.

inspiration as always comes from: 

north coast dolls
fig & me
little oke dolls
craft cottage
maryjanes tearooms
plus a few others.

well that's it for today, thanks for stopping by
enjoy your day and craft happy, Ann

Monday, 15 July 2024

Amelia a 13" natural fibre doll

good morning crafters.
sharing a new hot off the needles so to speak a natural fibre art doll whom i've named Amelia.
it seems like ages ago when i spent the weekend in clacton for the spring bank holiday to learn the skills of making a doll with an articulated head and how to firmly stuff the body with Meglena of North Coast Dolls and my fellow students, thankfully most of it sunk in, my doll is stunning if i do say so myself. there are still somethings i need work on but it amazes me how a piece fabric, a pattern, roving wool, various threads and a weft turns into something so beautiful.  i also have to say a hands on workshop is a must to all prospective doll makers. 


Amelia is now waiting for a new outfit which will be made hopefully over the next few weeks, hopefully i won't be side tracked.

Amelia is approx 13"/30cms tall

some of the items needed at the begining of a new doll


early stages of the doll making process. the wrong way around lol.
i decided as soon as i'd added the head to her torso i would add her locks..


below Amelia's articulated head in different positions


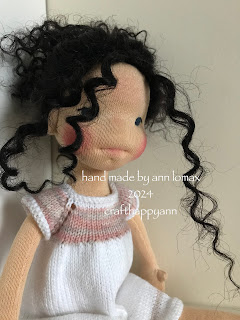
 Amelia is complete with a beautiful black curly weft which has been sewn on direct as i still can't master crocheting a wig and she has beautiful blue eyes complete with very rosy cheeks..

when Amelia is finally finished i will share photo's 

inspiration as always comes from: 

north coast dolls
fig & me
little oke dolls
maryjanes tearooms
plus a few others.

well that's it for today, thanks for stopping by
enjoy your day and craft happy, Ann